

Video calls are now part of ordinary life, from team meetings and job interviews to catching up with family overseas. A blurry picture or muffled voice makes every call harder, and it is often easy to fix without spending much.
In this article we will discuss how webcams and microphones work, which features deserve your attention, how lighting and room sound shape what others see and hear, and a sensible order for upgrading your setup.
Clear calls start with simple basics
Most people assume that a poor call is the fault of the internet connection, and sometimes it is. Yet many problems that feel like connection trouble come from the camera, the microphone or the room. A dark face looks grainy because the camera must boost its sensitivity to see anything. A distant voice sounds thin and echoey because the microphone is picking up the walls as much as the speaker.
Before buying anything, spend ten minutes looking at your current setup. Join a call with a friend, or record yourself using the built-in camera app, and watch the result as a stranger would. Ask what bothers you most: the dark picture, the harsh shadows, the echo, the background noise or the robotic voice. Knowing the weakest link lets you spend money where it counts.
It also helps to separate three different problems. Picture quality depends on the sensor, the lens, the lighting and the software processing. Sound quality depends on the microphone, its distance from your mouth and the room. Connection quality depends on your network and how many people share it. Only the first two are the subject of this article, though a weak network can degrade both video and audio, so keep it in mind.
A useful habit is to write down what you notice in two short columns, one for what you see and one for what you hear. Review the list a day later, when you are calmer, and circle the items that would bother a colleague most. Often the same two or three problems appear again and again, and they point to the cheapest fix.
The good news is that you do not need studio equipment. A reasonable webcam, a decent microphone and a few room adjustments can make a home office look and sound professional. Ordinary expectations are modest: a clear face, even light, a steady frame and a voice that is easy to follow. Reaching that standard is far more affordable than most advertisements suggest.
Lighting and framing matter before the camera
Light is the single biggest influence on how you look on camera. A camera sensor turns light into an image, and when there is little light it amplifies the signal, which adds visible noise and softens detail. More light lets the camera work at a lower sensitivity and produce a cleaner picture. This is why a modest camera in a bright room can beat an expensive camera in a dim one.
The best light is soft and comes from in front of you. Position yourself facing a window so daylight falls evenly on your face, and avoid sitting with a window behind you, which turns you into a silhouette. If daylight is unreliable, a desk lamp with a diffuser, or a small panel light, placed slightly above eye level and to one side, adds a pleasant glow. A sheer curtain or a sheet of white paper over a lamp can soften harsh light cheaply.
Pay attention to the colour of your light as well. Mixing warm bulbs with cool daylight can give an odd tint, so try to use similar lights in the room. Most cameras adjust white balance automatically, though some let you lock it manually. If your skin looks orange or blue, adjusting the bulbs or the camera setting usually helps.
Framing is the other half of the picture. Place the camera at or slightly above eye level so you are not looking up at it, which gives an unflattering angle. Raising a laptop on a stand or a stack of books is a simple way to do this. Centre your face in the upper part of the frame, leaving a little space above your head, and sit about an arm’s length from the screen.
Eye contact deserves a thought as well. Most people look at the faces on screen rather than the lens, which makes it seem to others that you are gazing slightly downward. Moving the video window close to the camera, so that the faces sit just below the lens, narrows that gap. For important moments, such as a greeting or a key point, glance at the lens itself.
Look at your background too. A tidy wall, a bookshelf or a plain surface is better than a pile of laundry or a bright light in shot. Avoid sitting directly in front of a mirror or a glossy window. If you cannot change the room, a virtual or blurred background can help, although those effects sometimes cut around your hair or hands in odd ways.
Webcam features worth paying attention to
Not every webcam feature is worth paying for. Resolution is the most advertised, but a higher number does not guarantee a better picture. Many video call services compress the image heavily, so a very high resolution camera may not look different from a standard high definition one during a call. Sensor size, lens quality and software processing often matter more than the headline number.
Common resolutions are standard high definition, which is the practical sweet spot for most calls, and higher levels that suit streaming, recording and presentations. If you only attend meetings, a good high definition camera is plenty. If you make video content, higher resolution gives you room to crop and edit. Frame rate matters too, and smooth motion at thirty frames per second is typical, with higher rates helping fast movement in recordings.
Several other features are worth checking. Autofocus helps when you move or hold an object up to show it. A wide lens takes in more of the room, which suits group calls but can distort faces at the edges, so narrower fields of view suit solo calls. Low-light performance is hard to judge from a specification sheet, so independent reviews with sample footage are a better guide. A physical privacy shutter lets you cover the lens without relying on software.
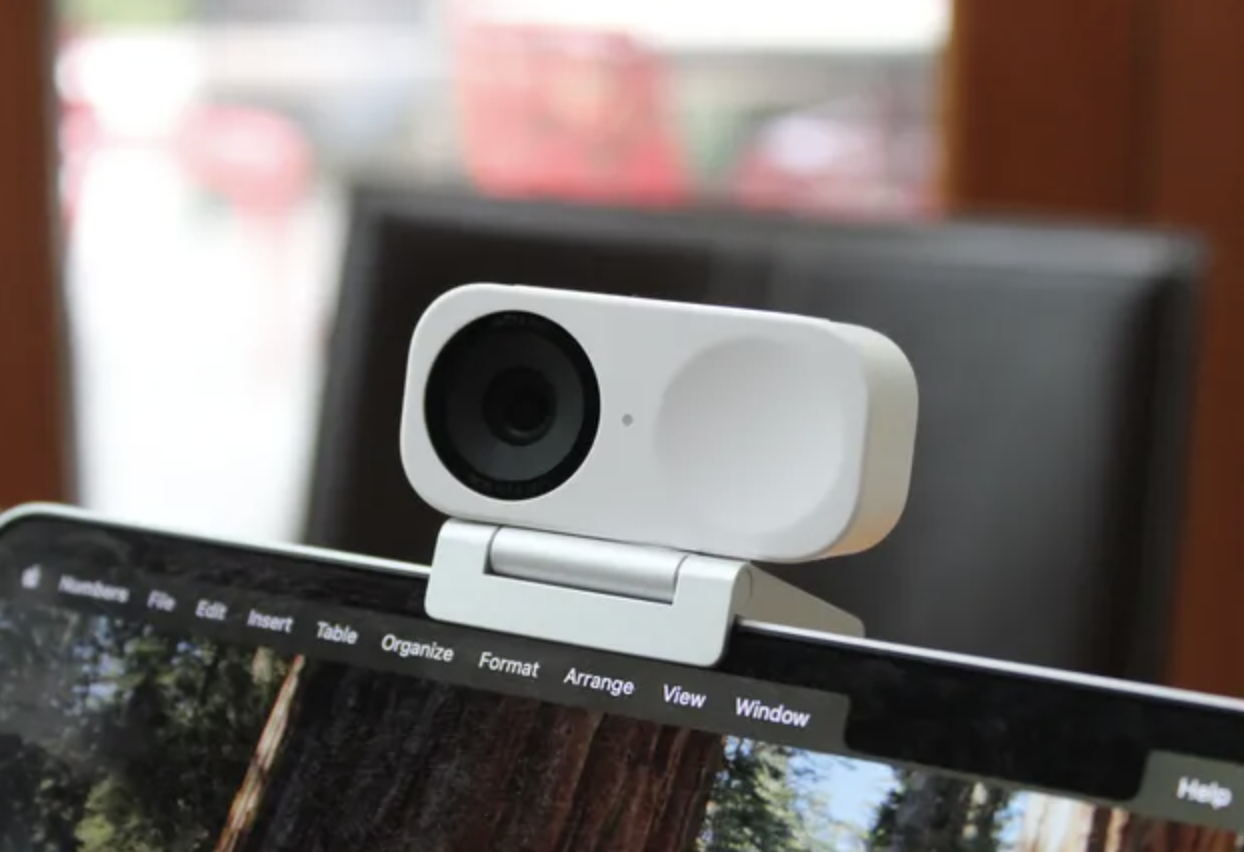
Built-in laptop cameras have improved, but they are often small and sit at an awkward low angle. An external webcam that clips to the top of a monitor gives you control over height and distance. Some people prefer to use a smartphone or a dedicated camera as a webcam, which can give a very good picture, though it needs mounts, power and software. This adds complexity, so it suits those who need the quality rather than those who want simplicity.
Think about stability too. A webcam that slides on a monitor or sags on a thin laptop lid gives a shaky frame and constant readjusting. Look for a clip or mount that grips firmly, and consider a small tripod or a desk arm if your screen is unusual. Thread sockets on the base of many webcams make such mounting easy, although you should confirm the fit before buying.
Check how the camera connects. Most webcams use a USB cable, and many work without special drivers on common operating systems. Make sure the port and cable are compatible with your computer, and avoid cheap extension cables that limit the data. If you want manufacturer software for extra controls, check that it supports your system, since support differs between Windows, macOS and Linux.
| Feature | What it does | Worth paying for? |
| Resolution | Sets the level of picture detail | Standard high definition is enough for most calls |
| Autofocus | Keeps you sharp when you move | Yes, especially if you show objects |
| Field of view | Controls how much of the room is visible | A narrower view suits solo calls |
| Low-light handling | Reduces grain in dim rooms | Useful, but better lighting helps more |
| Privacy shutter | Physically covers the lens | A simple and reassuring extra |
| Built-in microphone | Records your voice | Fine as a backup, rarely the best choice |
Microphone types and which suits your room
The microphone is the part of your setup that most affects whether people enjoy talking to you. Microphones come in several broad categories, and each suits different situations. Built-in laptop and webcam microphones are convenient but sit far from your mouth and pick up keyboard clicks, fans and room echo. They are acceptable for occasional calls but rarely the best choice for daily meetings.
A headset with a boom microphone places the capsule close to your mouth, which gives a clear voice and reduces background sound. This is the most dependable choice for noisy homes and open offices. Wired headsets avoid battery worries and pairing problems, while wireless ones give freedom of movement. Comfort matters if you wear one all day, so look at weight, ear padding and clamping force.
A USB desktop microphone is a popular middle option. It plugs directly into the computer, needs no extra audio equipment and usually sounds richer than a built-in microphone. Position it on a stand or boom arm, a hand’s width or two from your mouth, aimed slightly off to the side to soften sharp consonants. Desktop microphones pick up more of the room, so they work best in quiet or treated spaces.
Lavalier microphones, often called lapel microphones, clip to clothing close to your mouth. They are discreet and suit presentations, interviews and standing work. Be careful of rustling clothing and jewellery, and place the clip where it does not rub. Some wired models plug into a computer or phone, while wireless sets include a transmitter and receiver, which adds cost and setup.
Wireless and Bluetooth headsets deserve a short warning. Bluetooth audio can lower the voice quality when the same headset is used for both listening and speaking, because the connection switches to a mode designed for calls. A wired headset or a dedicated wireless receiver often sounds better and has less delay. If you rely on Bluetooth, test it in a real call before an important meeting and keep it charged.
Finally, there are professional microphones that connect through an audio interface. These can deliver excellent sound, but they add expense, cables and learning for most call users. Unless you record podcasts or music, a headset or a USB microphone is usually sufficient. Choose by your environment, since a noisy room favours a close microphone, while a quiet room allows more choice.
Pickup patterns also matter. A cardioid pattern captures sound mainly from the front and rejects much from behind, which suits a single speaker at a desk. Omnidirectional microphones capture all around, which suits a group sitting around a table. Some units let you switch patterns, which adds flexibility if you share the microphone between solo and group use.
Audio is more than the microphone
Even a good microphone can sound poor when the signal is mishandled. Distance is the first factor. As you move away from a microphone, your voice gets quieter relative to room noise and echo, so the recording sounds thinner and more distant. Keeping a consistent distance, often described as a fist or two from the mouth, helps keep your voice steady and clear.
Gain, sometimes called input level, is the next factor. If it is too high, loud words distort and harsh peaks sound crackly. If it is too low, quiet words disappear and the software has to amplify noise. Aim for a level where your normal speaking voice sits comfortably in the middle of the meter and your loudest laugh does not hit the top. Check your operating system sound settings or the audio software provided with the microphone.
Plosives, the bursts of air on sounds like p and b, can cause popping. A foam cover or a pop filter reduces this, and so does speaking slightly across the microphone rather than directly into it. Keyboard clatter is another common annoyance, because desk vibrations travel into the microphone. A boom arm, a shock mount or a softer desk mat can reduce this, and typing more gently also helps.
Pay attention to what you hear as well. Headphones prevent your colleagues’ voices from leaking back into your microphone, which causes echo for everyone. Open-back headphones leak more than closed-back ones, so closed or in-ear designs suit meetings. If you use speakers, expect more echo, and rely on the call software’s echo cancellation, which works better with some setups than others.
Many call services include noise suppression that filters background sounds like fans, traffic and keyboard clicks. It can be remarkably handy, though aggressive filtering sometimes clips the start of words or removes music and laughter. Try it on and off during a test call and ask someone which sounds better. Software cannot fully repair a bad recording, so treat it as a polish rather than a replacement for good placement.
Room acoustics cost less than new gear
Hard surfaces bounce sound around. Bare walls, glass and wooden floors create reflections that blur speech and make a room sound hollow. The microphone captures these reflections along with your voice, and the result is the echoey sound many people recognise from empty rooms. Reducing reflections can improve the sound more than buying a more expensive microphone.
Soft materials absorb sound. A rug, curtains, upholstered furniture, bookcases filled with books, and even a bed with a duvet can make a room much more pleasant to record in. Hanging a thick blanket behind the microphone or on the wall across from you is a cheap trick used by many home recording enthusiasts. Specialist acoustic panels exist, and they do work, but ordinary household items provide a good start.
Think about placement in the room. Avoid sitting in a corner or right next to a bare wall, because reflections are strongest there. Moving a desk toward the middle of the room, or facing a bookshelf or curtain, can help. Position the microphone away from noisy sources like computer fans, air conditioning vents, printers and external hard drives.
Control the noise you cannot remove. Close windows if street sound is loud, and schedule calls around noisy household tasks. Tell the people you live with when you are on an important call, and a simple sign on the door can prevent interruptions. Mute yourself when you are not speaking in large meetings, since it reduces background noise for everyone.
Large meeting rooms bring different problems. A single microphone in the middle of a long table cannot hear everyone equally, so people at the far end sound faint. In that case a conference speakerphone or a microphone designed for rooms is a better choice than a webcam microphone. Place it in the centre, away from laptops, papers and anything that rattles.
Consider power and cables as well. Poor cable management can cause electrical hum or accidental tugs that knock the microphone. Keep audio cables away from power cables when you can, and use good quality USB cables of reasonable length. If you hear a buzz, try a different USB port or unplug nearby chargers to find the source.
Software settings, privacy and connections
Hardware is only part of the story, because software decides how the camera and microphone behave. Open the settings in your call application and pick the right devices, since computers often default to the built-in camera and microphone even when you plug in better ones. Many people buy new gear and keep using the old devices for weeks without noticing. Look for the camera and microphone drop-down menus and confirm your choice at the start of each call.
Explore the video settings. Some applications offer brightness, contrast and low-light adjustments, and some let you mirror your own preview. Mirroring only affects what you see, not what others see, so text on a whiteboard still appears the right way round to them. Turning off any heavy filters can improve the picture and reduce the load on your computer.
On the audio side, check input level meters and available processing options. Echo cancellation and noise suppression often work best when switched on in the call application, but you should avoid layering several noise filters from different programs at once, because they can interact badly. If you use a microphone with its own software, decide whether to use its processing or the application’s, not both. Simpler setups tend to be more reliable.
Privacy deserves care. Check which applications are allowed to use your camera and microphone in your system settings, and remove permissions you do not need. A webcam cover or shutter is a low-tech safeguard, and a hardware mute button on a microphone gives clear feedback that it is silent. Keep your operating system and device software updated through official sources, and use strong passwords for accounts linked to your devices.
Think about bandwidth too. Video uses more data than audio, and a weak connection can force the application to lower the picture quality. If the network is struggling, turn off your camera and keep the audio on, because clear sound matters more. Using a wired network connection, moving closer to the router or asking others to pause large downloads can improve both video and audio. Details differ between countries and providers, so check your own home network setup.
Testing your setup before an important call
A short test saves embarrassment. Use the preview feature in your call application, or record a one-minute clip with the same software you will use in the meeting. Watch it back with the sound turned up and the screen at normal size. Note anything that looks dark, shaky or unflattering and anything that sounds distant, boomy or noisy.
Run through a simple checklist. Is your face evenly lit, with no strong light behind you? Is the camera at eye level and the frame steady? Does your voice sound natural when you speak at a normal volume, and do you hear keyboard noise? Are the correct devices selected, and are notifications silenced so that pings do not interrupt?
Ask a friend or colleague for feedback, since they hear what others hear. Ask them to describe your volume, clarity and any background sounds, and to say whether the picture looks sharp. People are usually happy to help with a short test, and their comments are more reliable than your own judgement of your voice. After a few tweaks, repeat the test to confirm that the changes helped.
Check your notifications and background programs before you start. Close large downloads, silence chat alerts that might pop up on a shared screen, and shut programs you do not need, because a busy computer can make video stutter. Plug in your laptop if the call will be long, since many machines slow down on battery power to save energy.
Prepare for the unexpected too. Keep a spare headset or earbuds within reach in case your main microphone fails. Know where the mute button, camera button and leave button are in your application. Have a plan to switch to audio only or to a phone call if the connection fails, and keep the meeting details handy so you can rejoin quickly.
Conclusion
Start with the free fixes. Face a window or add a lamp, raise the camera to eye level, close the door and move closer to the microphone. Record a short test, then listen and look. This costs nothing and often solves most of the problem.
If the sound is still weak, upgrade the microphone before the webcam. A headset with a boom microphone or a USB desktop microphone on a stand brings the biggest improvement for the lowest price. Add a few soft items to the room to cut echo, and set the correct device in your software. Test again before moving on.
Only then consider the webcam. If the picture is still soft or dark after you have fixed the lighting, look for an external camera with good autofocus and low-light behaviour, and buy from a seller with a fair return policy. Avoid paying for features you will not use, and be cautious of claims that sound too good. Read independent reviews that show sample footage rather than relying on specification lists.
Finally, keep the setup simple and reliable. Label your cables, keep a spare, review privacy permissions now and then, and run a brief check before important calls. A calm, clear and well-lit call helps everyone concentrate on what is being said, which is the real goal of any upgrade.