

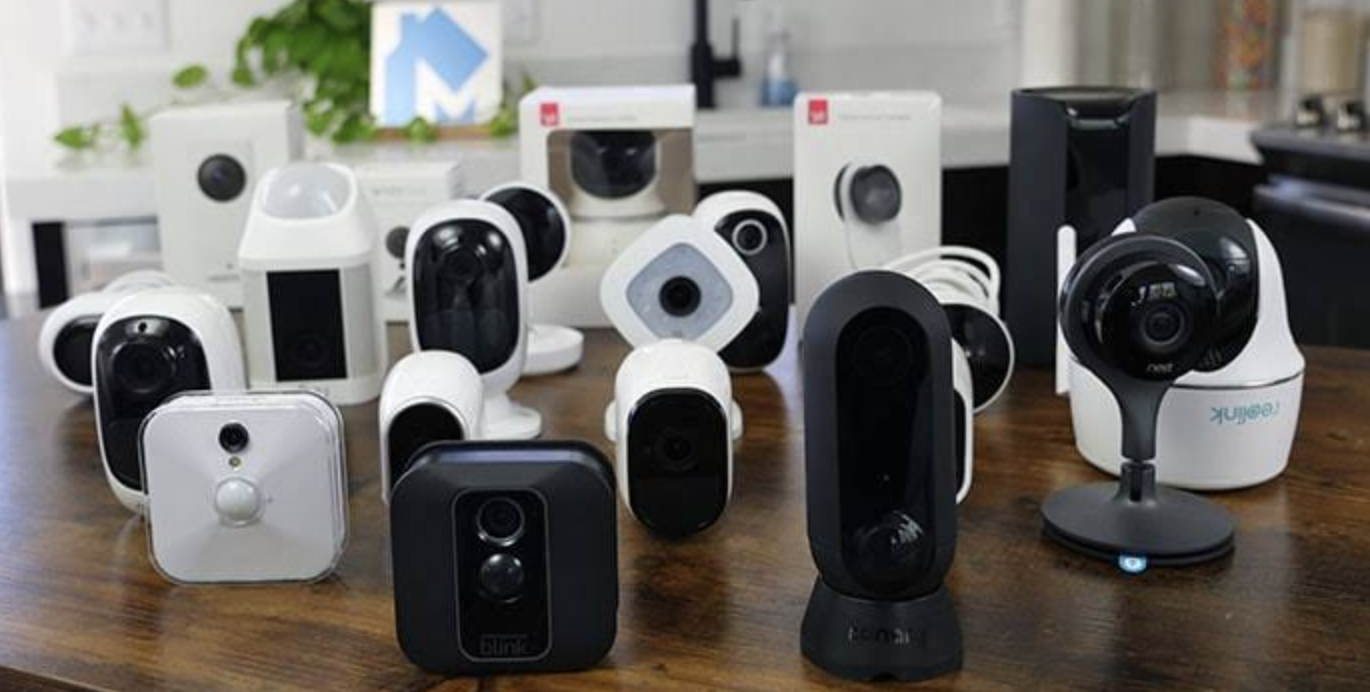
A home security camera can give you peace of mind, but it also puts a lens, a microphone and an internet connection inside or around your most personal space. Choosing well means balancing safety, convenience, cost and the privacy of everyone who lives in or walks past your home.
In this article we will explore how the main camera types differ, how storage options work, what privacy risks to watch for, where to place cameras, and how to set everything up safely.
Wired, battery and plug-in cameras compared
The first practical choice is how the camera gets its power, because that decides where you can put it and how much upkeep it needs. Wired cameras connect to mains electricity, or to a network cable that carries power and data together, and they usually offer the most dependable recording. Battery cameras are easy to mount almost anywhere, but the cells need recharging or replacing, and cold weather can shorten their running time. Plug-in indoor cameras sit on a shelf and draw power from a wall socket, which makes them simple to move and cheap to try.
Wireless does not mean cable free. A camera that connects over Wi-Fi still needs power, and a weak signal at the edge of your home can cause missed clips, delayed alerts or a feed that drops without warning. If you plan to cover a garage, a shed or a back garden, check the Wi-Fi strength at the exact mounting spot with your phone before you drill anything. A wired network connection, where the camera plugs into the router through a cable, avoids signal problems altogether, though it takes more effort to install.
Think about how often you are willing to touch the hardware. A battery camera on a high bracket can be a chore to reach every few weeks, so people sometimes let it run flat and then wonder why a delivery went unrecorded. A camera with a fixed power source asks nothing of you after installation. If you rent your home and cannot make holes in walls, a battery or plug-in model with a stand or adhesive mount may be your only practical route, and that is a perfectly sensible trade.
| Type | Power | Best for | Main drawback |
| Wired with network cable | Mains or powered cable | Permanent outdoor coverage | Installation effort |
| Wi-Fi with mains power | Wall socket or adapter | Indoor rooms, garages | Depends on signal strength |
| Battery powered | Rechargeable cells | Renters, hard-to-wire spots | Regular charging, shorter alert history |
| Solar-assisted | Battery plus panel | Sunny exterior walls | Needs good daylight exposure |
Local storage, cloud storage and hybrid setups
Where your footage lives matters as much as what the camera records. Local storage means a memory card in the camera, or a recorder or small home server on your own network. Its biggest benefits are that you control the files, there is usually no subscription, and your clips are not sitting on a company’s servers. Its biggest risk is that a thief who removes the camera or the recorder takes the evidence with them.
Cloud storage sends clips over the internet to a service run by the camera maker or another provider. If the camera is smashed or stolen, the recording of the person who did it is already safe somewhere else. The trade-offs are an ongoing fee in many cases, reliance on your internet connection, and the question of who can access the footage, how long it is kept and in which country it is stored. Read the provider’s privacy policy and retention settings before you commit, because policies differ between companies and regions.
A hybrid approach is often the most sensible. The camera records continuously or on motion to a local card or recorder, and uploads only important event clips to the cloud. That way you keep a full timeline at home, and you still have an off-site copy of the moments that matter most. To plan capacity, remember that higher resolution, higher frame rates and continuous recording all use more space, while motion-only recording uses far less.
Bandwidth is a hidden cost of cloud recording. Each camera that uploads video uses part of your home internet connection’s upload speed, and several cameras recording at high quality can slow video calls and cloud backups for everyone else in the house. Check the upload speed your plan provides, which is often much lower than the download speed, and lower the stream quality if your connection struggles.
Whatever you choose, decide on a retention period and stick to it. Many households keep footage for a couple of weeks and then let it overwrite automatically, since older clips rarely matter and holding them longer only increases what could leak. Check that your recorder or card is a type designed for constant writing, because ordinary memory cards can wear out when they record around the clock. Finally, set a calendar reminder every few months to play back a clip from last week and confirm that recording is still working.
Privacy risks that come with a camera on your wall
Any connected camera creates a record of people, and that record can be misused if it is poorly protected. The most common problems are not dramatic hacks but weak passwords, reused passwords and shared logins that nobody remembers to remove. Former partners, old housemates and past tenants sometimes keep access to a camera feed long after they should have lost it. Make it a habit to review who can view your cameras whenever your household changes.
Indoor cameras deserve extra caution. A lens in a living room, bedroom or nursery captures moments that you would never want exposed, so think carefully about whether you need a camera there at all. If you do, consider a model with a physical shutter or a setting that disables the lens when you are at home, so that the camera records only when the house is empty. Microphones raise their own issues, because recording conversations is treated more strictly than recording video in many places.
Your neighbours and passers-by have privacy too. Rules about filming public areas, shared driveways and neighbouring windows differ between countries and even between regions, so check your local guidance before pointing a camera at anything beyond your own boundary. A sensible rule is to frame only your door, your yard and your vehicle, and to use privacy zones, which are masks that black out parts of the picture, for anything else. Visitors, babysitters and tradespeople should be told when a camera is present, and a small sign is a courteous and often legally useful way to do it.
Children and teenagers deserve a thoughtful approach as well. A camera in a shared hallway is easy to explain, but a camera in a young person’s room can damage trust and may be inappropriate at any age beyond infancy. Talk openly with the people who live with you about what is recorded, who can see it and when it is deleted, and listen to their concerns before you press record.
Finally, consider how long you keep footage and who might request it. Clips can be shared with police or insurers if you choose, but you should not post them publicly without thinking about the people in them. If someone appears in your recording and asks you to delete it, treat the request seriously and look up the rules that apply where you live.
Video quality features that matter more than megapixels
Shoppers often compare cameras by resolution alone, but a sharp picture is only useful when the camera can capture a face or a number plate at the distance you need. A wide-angle lens covers more ground but makes distant details smaller, while a narrower lens gives more detail on a small area such as a doorstep. Choose the field of view to suit the space, and test it by looking at a live feed from the exact mounting position.
Night vision is the next big factor. Most cameras use infrared lights that produce a black-and-white image in darkness, which works well but loses colour. Some models add a small white light or a more sensitive sensor to keep colour at night, which can help when you need to describe a vehicle or clothing. Whichever approach you pick, avoid pointing the camera at a glass window from inside, because infrared light reflects off the glass and washes out the picture.
Motion detection decides whether your phone becomes a constant nuisance. Cameras that can tell people from animals, vehicles and swaying branches cut false alerts a great deal, and activity zones let you ignore a busy pavement while still watching your gate. Adjust the sensitivity slowly, one step at a time, over several days rather than trying to perfect it in a single afternoon. A system that sends too many notifications trains you to ignore them, which defeats the point.
Compression and frame rate deserve a quick look too. A camera that records at a low frame rate can miss the instant a person passes through the frame, leaving you with a blurred shape or an empty doorway. Smoother recording uses more storage, so choose a middle setting for most cameras and reserve the highest quality for the entrance that matters most.
Other useful features include two-way audio for talking to a visitor, a built-in siren, clear timestamps and a wide dynamic range setting that copes with bright sky and dark doorway in the same frame. Weather resistance matters outdoors, so look at the rating the manufacturer publishes for dust and water protection. Do not pay extra for features you will never use, and keep in mind that the app you will use every day is as important as the lens.
Placement that covers your home without watching your neighbours
Good placement is cheaper than any upgrade. Most burglaries and package thefts happen at doors and ground-floor windows, so a camera covering the front door and another covering the back entrance gives the best value. Mount cameras high enough to be out of easy reach, but not so high that you only record the top of a person’s head. Many people find that roughly two to three metres, angled slightly downward, works well for entrances.
Before you fix anything permanently, hold the camera in position and check the live view at different times of day. Look for glare from the sun, headlights that sweep across the lens at night, and trees that will grow across the view over the summer. Make sure the camera is sheltered from direct rain if its design calls for it, and keep it away from spots where spiders and insects tend to build webs around the infrared lights, since they can cause constant false alerts.
Think about the camera as visible deterrence too. A clearly visible camera can discourage opportunists, while a hidden one may capture better evidence, but concealed cameras bring serious legal and ethical problems in many places, especially inside the home. For most households, a visible camera with a small notice is the more honest and practical choice. Avoid placing cameras in areas where people expect privacy, such as bathrooms, changing areas and guest bedrooms.
Flats, shared buildings and gardens need a little extra thought. In a shared hallway or communal car park, you may need permission from the landlord, building manager or neighbours before you fix a camera, and the camera may not be allowed to record shared areas at all. If your garden is overlooked, use privacy masks so that the picture shows only your own ground, and check what your lease or local rules say before you begin.
Cables and mounts should be tidy and weatherproofed. Seal any hole you drill, use a drip loop so rainwater cannot follow the cable into the camera, and keep power adapters out of the weather unless they are rated for it. If you are not comfortable working at height or with mains wiring, hire a qualified electrician, because mistakes can cause shocks, fires or falls.
Network and account security for camera owners
A camera is a small computer on your network, so protect it like one. Start with the account: use a long, unique password generated by a password manager, and turn on two-step verification so that a stolen password alone cannot open your feed. If the camera has a separate device password, change the factory default immediately, since default passwords are widely known and are among the most common ways cameras get exposed.
Next, look at your router. Update its firmware, change the default administrator password and use the strongest Wi-Fi encryption it offers. Many routers can create a guest network or a separate network for smart-home gadgets, and placing cameras there keeps them apart from your laptops and phones. If one device is compromised, the separation limits how far a problem can spread.
Be careful with remote-access features. Some cameras ask you to open ports on your router so you can view them from afar, which exposes the device directly to the internet and is rarely a good idea. Prefer cameras that connect outward to the manufacturer’s service or that work through a secure private network you control. Turn off features you do not use, such as public sharing links, voice assistants on cameras in private rooms and any cloud feature that you did not mean to enable.
Keep everything updated. Turn on automatic updates for the camera and its app where possible, and check from time to time that the manufacturer still supports your model with security fixes. If a device stops receiving updates, it is time to plan its replacement. Finally, when you sell, give away or recycle a camera, perform a full factory reset and remove it from your account so the next owner cannot see your home.
Outages, false alarms and maintenance habits that keep a system useful
Every camera system fails sometimes, so plan for the failures instead of hoping they never come. A power cut will silence a mains camera, a router, and anything else that depends on them, and an internet outage will stop cloud uploads and remote viewing. A camera with a local memory card will usually keep recording through an internet outage, while a small battery backup for the router and recorder can keep the whole chain alive for a short power cut. Decide which failure worries you most and spend your money there first.
False alarms are the other everyday problem. Spiders, rain on the lens, passing headlights and a neighbour’s cat can all trigger recordings, and a flood of notifications soon teaches people to swipe them away. Review your alert history once a week for the first month, note which times and zones cause the noise, and then tighten the settings one step at a time. Treat a quiet, accurate system as the goal, because an alert you trust is far more useful than a hundred you ignore.
Cleaning and checking take only a few minutes and prevent many headaches. Wipe the lens gently with a soft, dry cloth every month or two, because dust, pollen and water spots blur the picture and confuse night vision. Check mounts and cable seals after storms, and confirm that battery levels in the app look sensible. Open the live view at night to see whether an insect, a spider web or a new tree branch has changed what the camera sees.
Build a short routine you can repeat without effort. Once a month, open each camera view and look for blur, glare or a shifted angle. Once a season, update the camera software, the app and the router firmware. Twice a year, review who has access to your account, and once a year play back an old clip to confirm that storage and retention still behave as you expect.
Keep the routine written down somewhere simple, such as a note on your phone, so that the job does not depend on memory. If a camera begins to drop offline regularly, resist the urge to replace it straight away. Move it closer to the router for a day to test whether the signal is to blame, and look for a pattern, such as failures that happen only when the microwave is running or when a neighbour’s network is busy.
How to set up a new camera step by step
A calm, ordered setup prevents most frustration. First, unbox the camera and charge or plug it in near the router, then install the maker’s app and create the account with a unique password and two-step verification. Second, add the camera in the app and let it connect to Wi-Fi, which on most models means scanning a code or following spoken prompts. Third, check for a firmware update before doing anything else, because new devices often ship with older software.
Fourth, carry the camera to its intended spot while holding it, and look at the live view on your phone from several positions. Check Wi-Fi strength at that location, since a camera that works on the kitchen table may struggle at the far end of the house. If the signal is weak, consider a mesh node, a wired connection or a different location rather than accepting a flaky feed.
Fifth, mount the camera, then set up the details. Draw activity zones and privacy masks, choose the alert types you want, and set a sensible schedule so the camera is less intrusive when you are at home. Choose the storage method and retention time, and confirm that clips are saved by triggering a test event. Name each camera clearly, for instance front door or garage, so that alerts make sense at a glance.
Sixth, write down the details you will need later, such as the camera names, the account email address and the date you installed each unit. This sounds like a small step, but it saves time when you have to troubleshoot, hand over the house or claim on insurance. Keep this note in the same place as your router details.
Finally, share access carefully. Give family members their own accounts instead of passing around your login, and remove people who no longer need access. Tell everyone in the household where the cameras are and when they record. Then test at night, test the siren if there is one, and play back a clip from the following morning to be sure the system does what you expect.
| Setup check | What to confirm |
| Account | Unique password and two-step verification enabled |
| Network | Router updated and camera on a guest or separate network |
| Picture | Day and night views checked from the real mounting spot |
| Alerts | Zones set, false alerts reviewed after a few days |
| Storage | Test clip saved, retention period chosen |
| Privacy | No bedrooms or bathrooms covered, signs posted if needed |
Conclusion: Which option should you choose?
Start from your situation rather than from a feature list. If you own your home and want dependable coverage of the entrances, a wired camera with local recording and optional cloud backup for key events is a strong foundation. If you rent, a battery or plug-in camera with a stand or adhesive mount will give you flexibility, and you can take it with you when you move. If your main concern is a pet, a child or an elderly relative, an indoor camera with a privacy shutter and strict access controls is more suitable than an outdoor model.
Think about cost over several years rather than at the checkout. A cheaper camera with a mandatory subscription can cost more than a pricier one with free local storage, while a free service that ends support may leave you with an unsafe device. Ask yourself how long the maker has supported its products with updates, how clear its privacy policy is and whether you can export your footage if you switch brands.
Do a quick budget check before you buy. List the cameras, the storage card or recorder, any mounting hardware, a possible battery backup, and any subscription you plan to keep, then add them up for a period of three years. That total often looks different from the price on the box, and it makes it easier to compare a fully local system with a cloud-based one on honest terms.
Begin with one or two cameras at the places that matter most, live with them for a month, and adjust before you add more. Lock down your accounts and router first, because a camera that protects your home but exposes your family online is no improvement. If you have concerns about local laws, shared spaces or recording audio, check with your local authority or a legal professional, since rules vary by country. A thoughtful, modest setup that you maintain will serve you better than a large one you forget about.